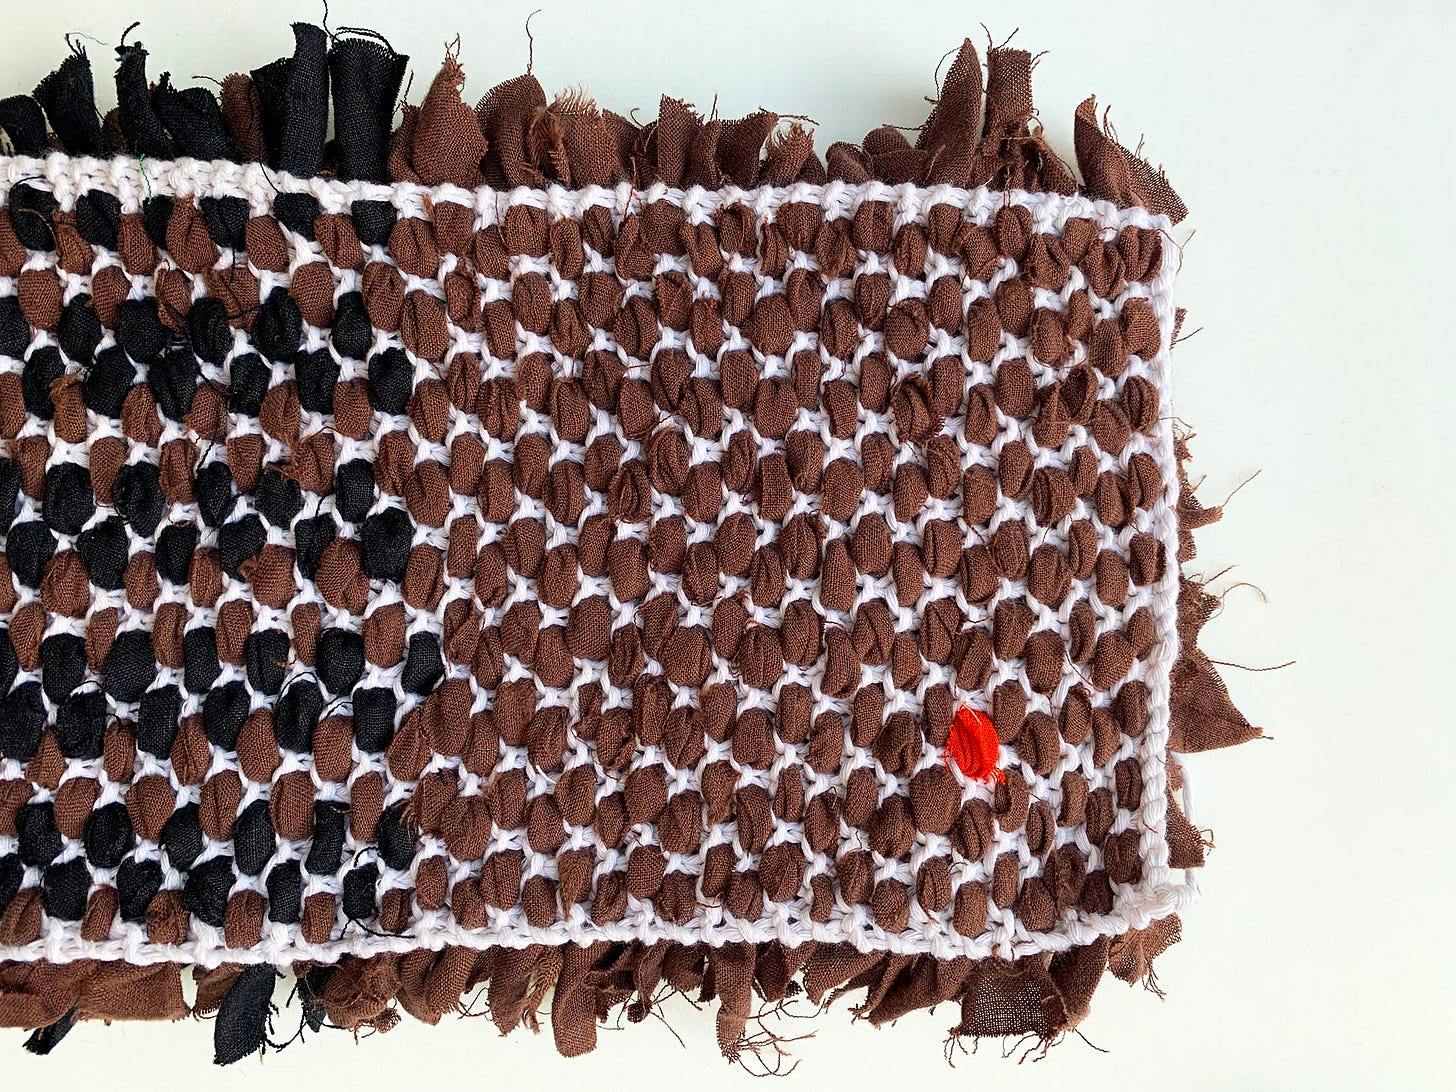
This week I got to sit down and teach someone how to knit a shag rug, which meant that I got to see someone else knitting a shag rug for the first time. It was a nice moment. I hope she’ll pass it on! I’m feeling as though I’ve learned enough small things about this craft to be able to share a little, although my first rug is far from finished. My original glimpse into knitting a rag rug came from this photo in the Smithsonian archive, but further research has led me to believe that a lot of rugs looking like this were made by adding rag strips to an already finished rectangle of burlap, crocheted or knitted cloth, or even an old woven rug- latchhook style or using this tool. Here’s even a sewn variation that looks pretty fun. Whichever method you use, this is a real scrap eater and I’m putting it to work on my stash of shredded linen sheets.
Historically rugs like this were made with wool scraps, which have the asset of holding onto one another. I was a little nervous that linen strips would slip out. However, in the time since I started to knit my first shag rug I’ve worked a lot with a punch needle and a tufting gun and both tools have given me insights into the staying power of tension.
To knit a shag rug you will need:
-Kitchen twine or another dense, unstretchy yarn, approximately worsted weight.
-A lot of fabric to cut into strips. Strips can be 1-1.5” wide and 2.5-3.5” long. Cutting them all to the same dimensions will result in a more even pile. Being flexible about it will use up more scraps.
-Knitting needles that give you a tight gauge with your kitchen twine.
Cast on a multiple of 3 plus 2 extra stitches. My rug pieces above are 29 stitches wide. This fabric gets heavy fast, so I’m making long pieces that I’ll sew together.
Row 1: *Knit 1, place a rag strip between your needles, knit 2 (making sure that your working yarn has passed over the rag strip, trapping it within the fabric). Then pass the other end of the rag strip between your needles. Repeat from beginning until 2 stitches remain, knit 2. At the end of the row you can pull your strips a little to even them out if they look wonky. This can help reassure you that they are really in there, or let you know if you need to go down a needle size.
Row 2: Knit
Row 3: Knit 2, *place a rag strip between your needles, knit 2 (making sure that your working yarn has passed over the rag strip, trapping it within the fabric). Then pass the other end of the rag strip between your needles. Knit 1. Repeat from * until the end of the row. Note: This row has the rag strips shifted over one stitch, that’s all. This will ensure that your rag rows are offset from one another, creating better tension.
Row 4: Knit
Repeat these 4 rows until your rug strip is the desired length (or until it’s too heavy and you rework your plans to save your hands). Bind off in knit stitch instead of knitting your final row 4.
Some tips:
Strips don’t need to be cut with the grain- go wild.
Folding your strips in half lengthwise can help you wrangle them as you put them into your knitting.
Yes, it sheds little threads. Will it shed forever? Time will tell. I’m not worried because Tavi and I also shed so we have a pretty regular vacuum habit in our household, but if this will bother you hold it in consideration while auditioning fabric for your rag strips.
Finishing thoughts to come!
This is an incredible resource. My scraps and I thank you for your generous tips!
So excited to try this! Thanks for the accessible tutorial 🧶